Thursday, January 12, 2012

Portraits (Engagement Photos)

I am NOT a portrait photographer.  In fact I prefer to shoot inanimate objects.  They don't move or talk back to me.  But to save $$$ on the old wedding budget, we decide to take my son's engagement pictures ourselves. 
Mananass Stone House
 The first thing to consider when take portraits is LOCATION.  I drive past this stone house everyday on the way to the gym.  The battlefields have great scenery.  They are plain, but interesting in textures and views.
 Next, shoot in the morning or evening if possible.  We weren't able to do that so we used the full shade of the house to get a better light.
 Focus on the EYES!  If you have a Portrait setting give it a try.  I use my portrait mode and sport mode.  I like the continuous shooting ability so I don't miss a shot!
 Try different angles and positions.  I had a couple of great subjects!  They came up with all ideas for the pictures.  I like the more candid shots vs the "staged" pictures.
The Annanie moto, "Have fun"!!!!

 Matthew was saying,
"Walk cute my mom is taking our picture."  LOL


Love the hands!

 This last one I took with my Iphone and filtered with Instagram.  Its one of my favorites.
Lastly, take bunches of pictures.  I took 200 pictures and they picked out about 25.  You can use engagment pictures for slide shows, labels for wedding decorations, save the date cards and scrapbook memories!
Pin It

Monday, January 9, 2012

SNOW

Today we were blessed with a little bit of the white stuff!  The birds really hit the feeders hard during the storm. 
The male Cardinals popped against the falling white snow.


Our feeder attracted Downy Woodpecker, Juncos,
Cardinals, Chickadees,  & Nuthatchers.

Of course we had to go for a walk. 
I didn't even notice I caught a glimpse of Michael and
Blue between the branches.

The horse farms look so pretty in the snow.
Tomorrow, it will be 50 degrees again, sigh..... 
It was a nice little treat today!
For a great article on taking picture in snow go HERE Pin It

Tuesday, January 3, 2012

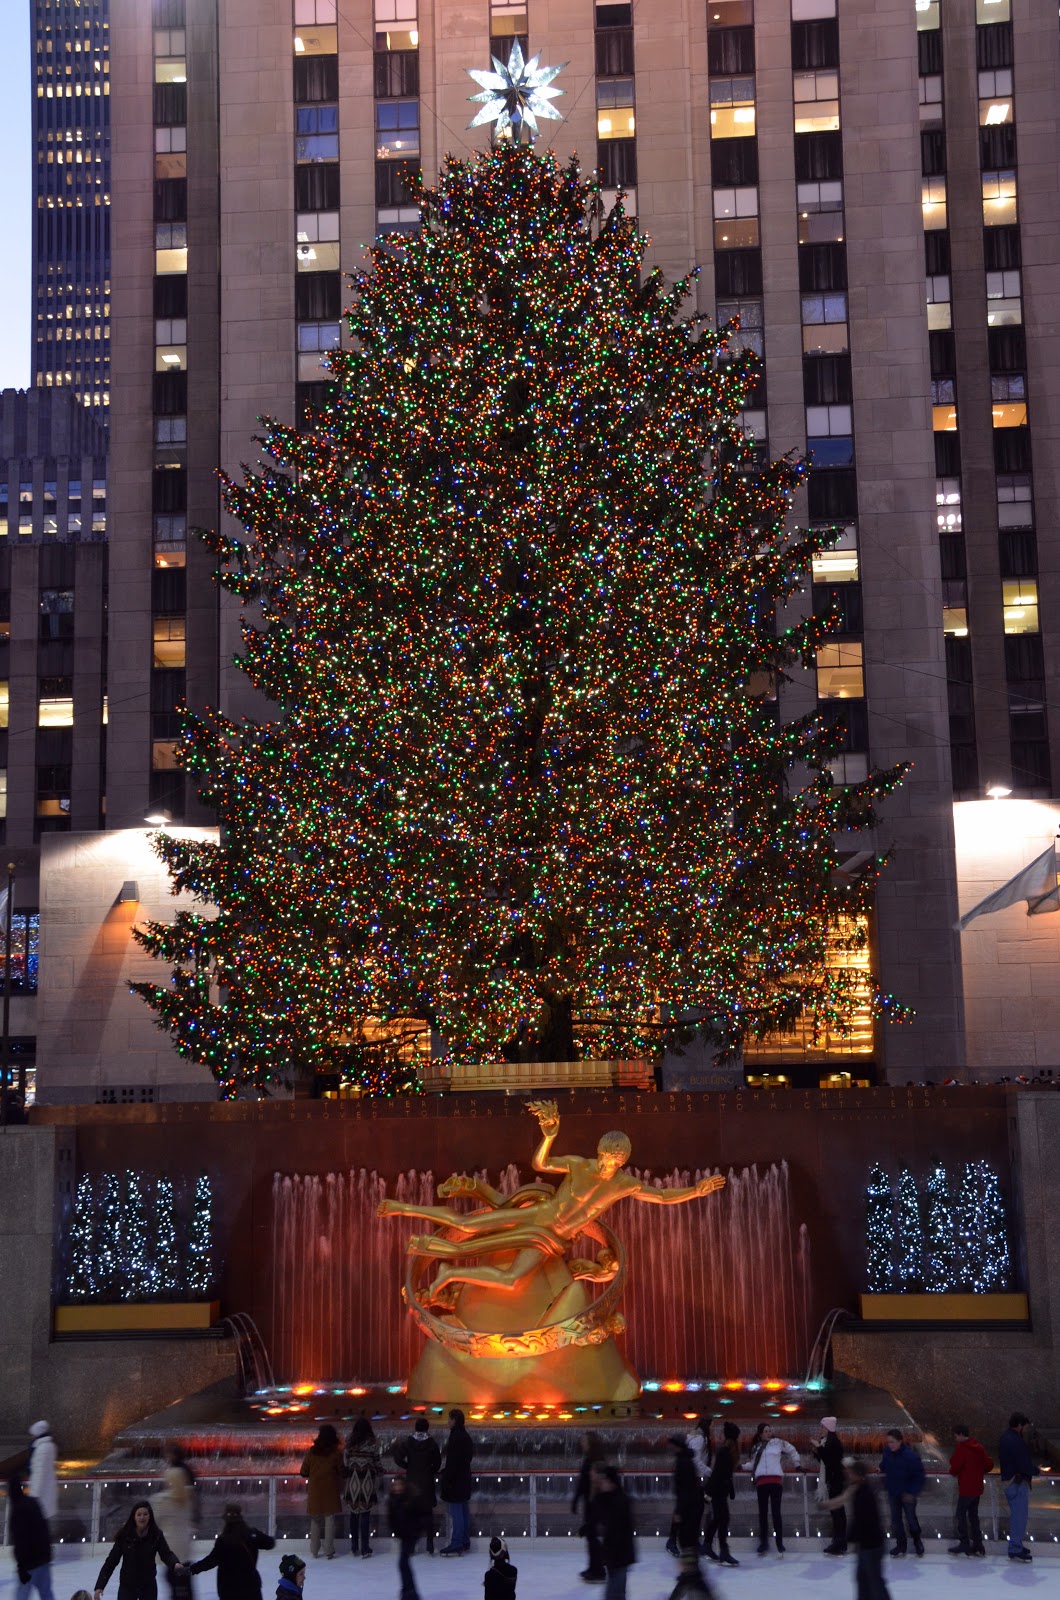
Christmas Lights in NYC

The best time to get those Christmas light pictures is right at dusk!  We hit the streets around Rockefeller Center and grabbed some fabulous city shots.
I used my night landscape setting.


Pin It

Thursday, December 29, 2011

Shooting in Low Light

As we went through the holiday season I am sure you had many opportunities to take pictures in low light situations. I have read many articles on the subject. My pictures use to get very grainy, until I discovered ISO. You can read about it HERE  

When I took these pictures below I had my ISO set to over 2200+  depending on how dark the area was.  Also look around for how the area is lit.  Try to get behind the spot lights, so you get more light.  I have a wide angled lense so it automaticly lets a bunch of light into the picture.  But having the higher ISO setting let me turn off my flash.  


ISO 2400

Of course having a tripod would help steady the photo but I didn't want to lug it around with me.
ISO 2500


ISO 2500

This was WAY up in the ceiling and I set it to 3500.  I didn't even notice the red until I loaded the picture on my computer. 
So next time you are at your childrens concert open up your ISO as high as it will go and shoot away! 
Pin It

Friday, December 16, 2011

Frosty

We woke up today to a frosty wonderlamd.  So I grabbed my camera to catch the frostiness.


Pin It

Monday, November 7, 2011

Birds

I love watching birds. I have several feeders in our backyard. But trying to get a photo of them is a bit tricky. They move fast and are startled easily.


On our trip to Colorado we saw some interesting birds. The key to shooting birds is a good zoom and shoot in your sport mode that has the continuous shooting. My pictures are not in great focus but those darn birds move so fast. I gave it my best shot!


These Lorikeets were at the KC Zoo.  We were able to feed them nectar in a cup.  That gave me the opportunity to get a good picture of them.

This Mountain Blue Bird was sitting on desert grass in
Red Rocks, Colorado.

We found the Ptarmigam while waking a trail. 
 He was hard to see because they camouflaged well.

We caught a shot of this Steller Jay
sitting on a pole at a trailhead.
You can get some great bird shots right in you backyard. Hang a birdfeeder outside your window. Put your camera on tripod near the glass. Dress in dark colors, so you don’t scare them away. Set you camera on continuous and snap away. I would love to see your pictures. Happy Shooting!


Pin It

Tuesday, November 1, 2011

Photo Assignment

As the trees turn brilliant colors go out and celebrate the season by taking a few pictures. 
These were taken on my recent travels. 

 Your pictures don't have to be of trees. They can be anything that reminds you of autumn. They can be pumpkins, kids dressed in costumes, corn mazes, pumpkins patches, fruits and veggies..... Take your camera for walk and get shooting.
Thanks for stopping by....................
Pin It

Wednesday, October 26, 2011

Perspective

Down the street are Civil War battlefields.  I went a little snap happy with the cannons.  It is a good practice to take photos from different angles. 


 So go out and find something interesting and take multiple pictures at different angles.  You may like what you find!  Have fun..........
Pin It

Friday, October 14, 2011

New Book & Photo Assignment

I found this book at my local library.  It gives step-by-step instructions, pictograms, and before-and-after comparisons that provide a complete course in capturing a landscape's natural beauty. Renowned photographer Tim Fitzharris reveals foolproof techniques he has used through decades of fieldwork in a wide variety of settingsTim gives great tips on how to capture spectacular vistas. While on our trip to Colorado I tried to use some of the tips to make my landscape photos better. Tim says that the lighting is one of the most important things in capturing the great landscape picture; I had to shoot in full sunlight. Sorry, when you travel you have to shoot whenever you are at a particular spot.


Tips:


  • Allow ¼ - 1/3 of frame for the sky.
  • Include overlapping terrain features
  • Include as many planes as possible to create a greater depth of field.
  • Shoot from different angles
This book contains so much information to pass on to you, so go to your local library and check it out. It’s a great read and learning tool.

 
This week assignment from Better Photo:
Capture a Scenic Landscape

  • Compose your scene, pay attention to graphic elements such as line, shapes and forms.
  •  Look for interesting shadows or reflections.
  • Try to make all elements lead in a nice way through the picture
I took these picture out in Colorado.

 My layers/fields in this picture are the sky, the snowy mountains, rocky hills and tundra field. 
By the way this is Red Rocks National Park, CO.

Can lanscapes be vertical?  Sure....  Here my layers are the sky, the tree, the rock and grassy area.  I focused on the two sides of the rock and let the grassy area pull your eye up to the tree at the top.


Rocky Mountain National Park

Here we have the sky, cloulds, trees, grass, water and reflection.  Can you see how each picture has different layers and elements to make it pleasing to the eye?  I really enjoyed taking these pictures.  While they are not the best lighting, I learned a lot about composition.
Pin It

Monday, October 3, 2011

Photo Assignment

This week's assignment is
MAKE GREAT BLACK &WHITE PHOTOS

I was going to delete this picture until I notice how the land drew your eye left and the clouds drew you eye right.  Since it was a cloudy day the land and water seemed to blend together.  So I changed it to B&W and I liked it much better.

Black and white photography is classic.  It helps you to focus on important elements in your picture.  Below, I took a picture of this gate with the lions head.  In color it seemed busy with all the stuff behing the gate.  By turning it black and white it helped to focus in on the lion.

Black & White tips:
  •   Shoot in color and convert your picture to B&W use photo software.  I use PICASA.
  • Look for lines, patterens,shapes, and forms as you frame your pictures.
  • Remember to "save as" a copy so you still have your color print.
  • I liked the curve of this buildings doorway.

Soooo many shapes in this one!

Happy shooting.............
Pin It